Construction Journal: 40gal Breeder(with pics)
Login
User Name
Password   


Registration is FREE. Click to become a member of OrchidBoard community
(You're NOT logged in)

menu menu

Sponsor
Donate Now
and become
Forum Supporter.

Construction Journal: 40gal Breeder(with pics)
Many perks!
<...more...>


Sponsor
 

Google


Fauna Top Sites
Register Construction Journal: 40gal Breeder(with pics) Members Construction Journal: 40gal Breeder(with pics) Construction Journal: 40gal Breeder(with pics) Today's PostsConstruction Journal: 40gal Breeder(with pics) Construction Journal: 40gal Breeder(with pics) Construction Journal: 40gal Breeder(with pics)
LOG IN/REGISTER TO CLOSE THIS ADVERTISEMENT
Go Back   Orchid Board - Most Complete Orchid Forum on the web ! > >
Reply
 
Thread Tools Rate Thread Display Modes
  #1  
Old 06-07-2007, 11:26 PM
andy83 andy83 is offline
Senior Member
 

Join Date: Apr 2007
Posts: 119
Construction Journal: 40gal Breeder(with pics)
Default Construction Journal: 40gal Breeder(with pics)

This is the same journal that I have on Dendroboard. I just figured that it might be nice for some of you to see it in a new thread here.

Thoughts, comments, suggestions and questions are very welcomed.

--------------------------------------------------------------------------

Hello everyone,

This is my first viv project and I am having a blast. It's still somewhat in the design stage. I just wanted to share my progress and see if anyone has any helpful comments or suggestions.


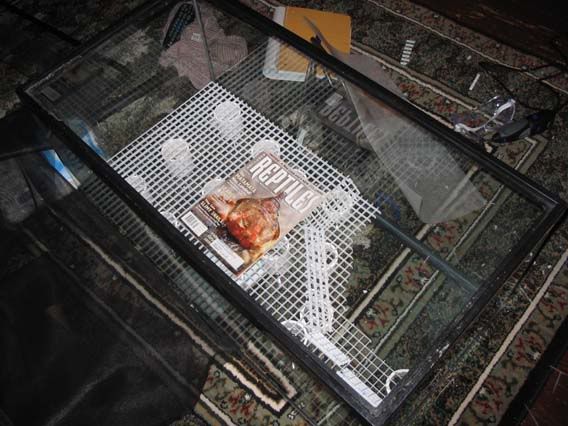
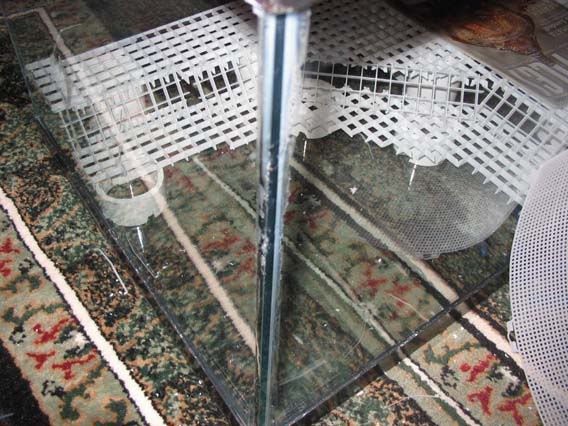
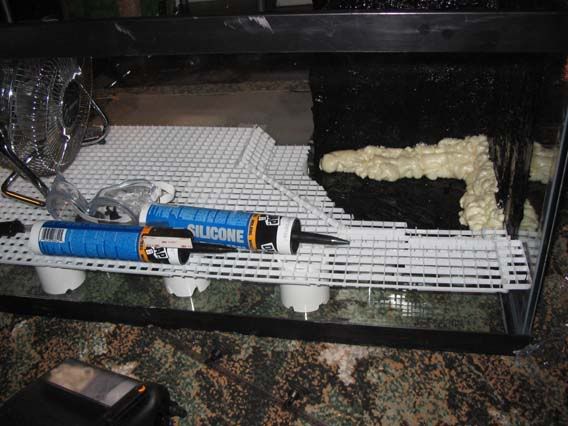
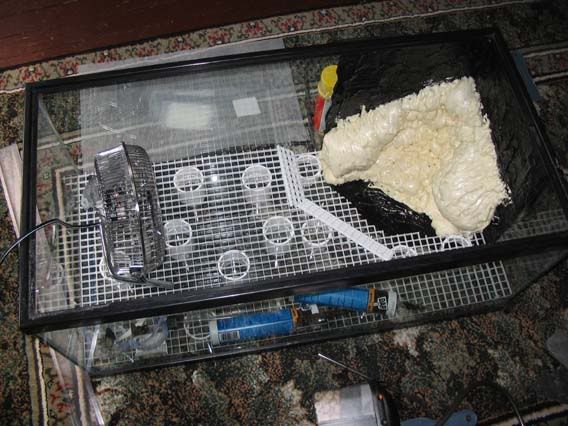
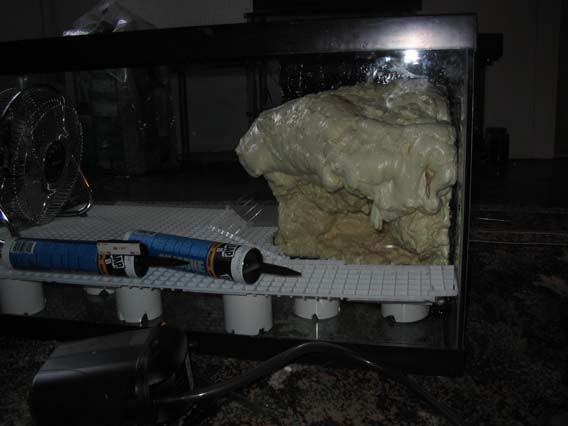
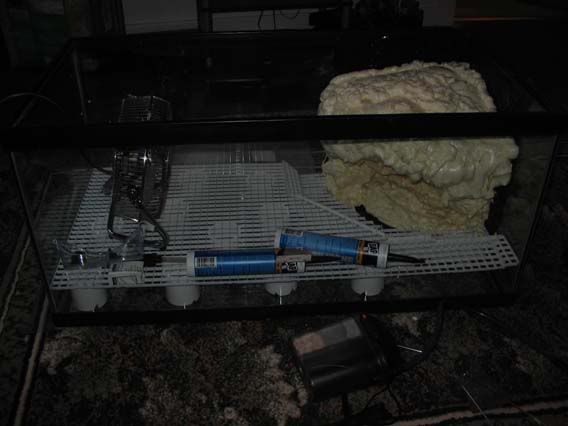
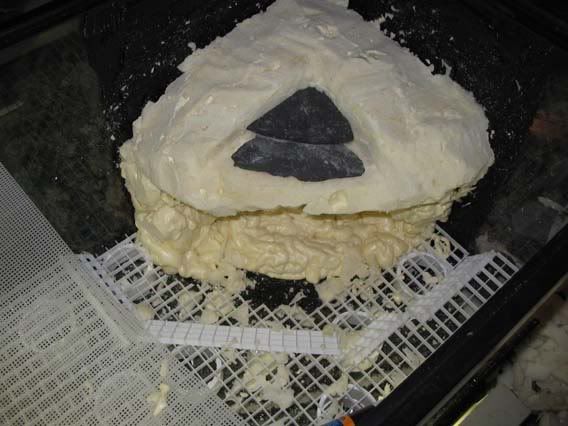
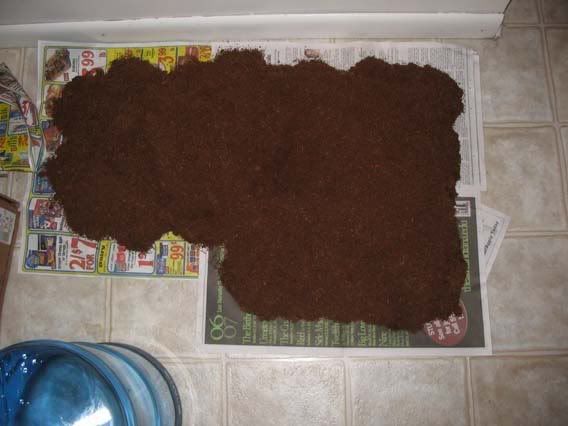
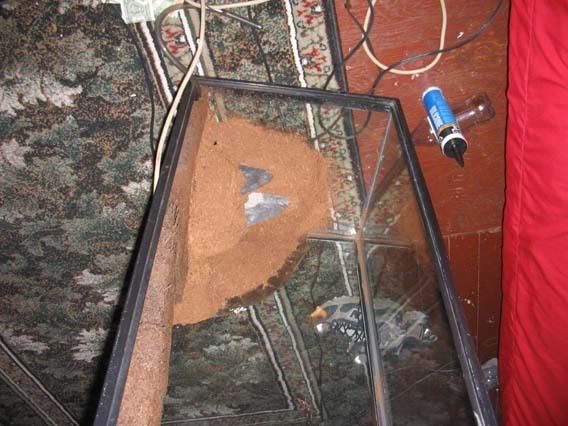
This picture shows the main water feature. It slopes up to around 3.75/4inches from the bottom. I really like how this is coming along. I'm going to use craft mesh for the bottom of the water fall area and most likely use pea gravel and other approved rocky material. I'm going to create a waterfall with greatstuff, DAP silicon and a nice piece of slate rock toward the top. I'm also going to make a barrier on the edges of the slopes with great stuff to hold the substrate in place. If anyone has any tips or knows of some good threads for these things please let me know. I have read and searched a lot but the more advice the better.


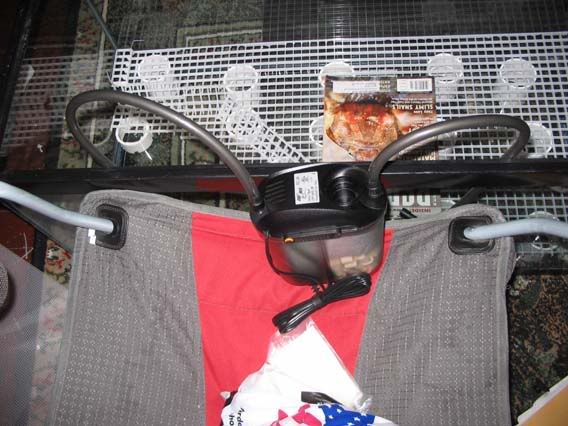
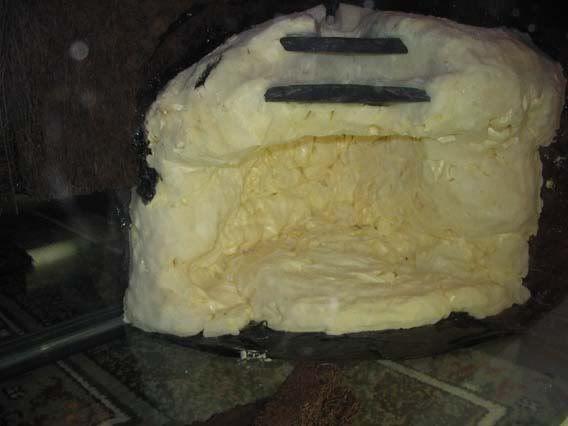
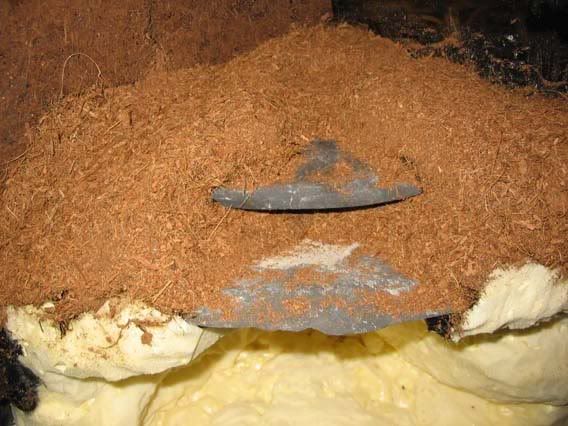
I'm going to use the zoomed501 for the feature. Does anybody use those clips that zoomed sells to clip the filter onto the tank? I need to look up some more info on those. I may just make my own I suppose. I will have 2in of water. Being a low tank, having the filter on top shouldn't be an issue with water flow(or at least I hope not).


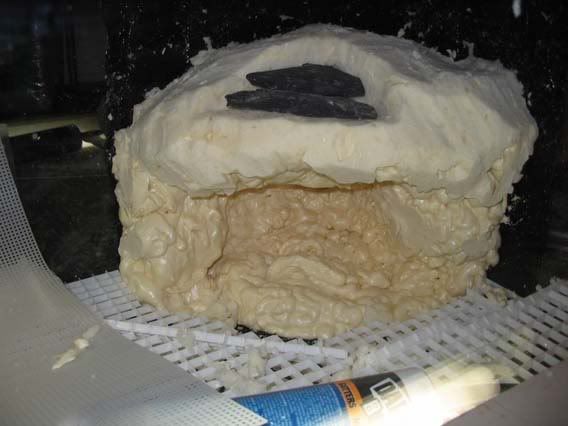
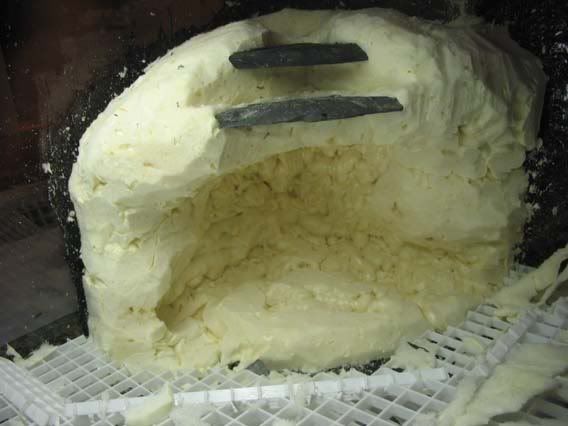
This picture shows where I'm going to place the intake of the filter. I'm still not 100% sure on how I'm going to do this one yet. I would like easy access just in case. I think I might just cut a hole in the egg crate, put it in, and then cover the hole with a larger sized portion of the crate. Then if I have to I can just dig up that corner and lift a section of egg crate. I cut large notches in all of the pvc to incorporate better water movement.
That piece of cotton resembles a dead mouse but I can assure you it's not(it was used to clean the tank) .


I just wanted to share and learn. If anyone has done something similar in design I would love to hear how it turned out.

Thanks in advance,
-Andy
Reply With Quote
Post Thanks / Like - 1 Likes
Likes mexorchid liked this post
  #2  
Old 06-07-2007, 11:29 PM
andy83 andy83 is offline
Senior Member
 

Join Date: Apr 2007
Posts: 119
Construction Journal: 40gal Breeder(with pics)
Default

So far I have siliconed the back of what is going to be the water feature. I've done this to make the outside look a little nicer and it's something the greatstuff will stick to better. As you can see in the pictures I have also started to greatstuff the water feature. The silicon was put on fairly thick so that took at least two weeks to cure. There is no longer a vinegar smell.


This is what it looked like the next day after we added a little more greatstuff and let it cure. I'm going to add more layers tonight. That will be the concave section of the waterfall. It's still got a little more work and more greatstuff but I'm pleased so far with the outcome.

Reply With Quote
  #3  
Old 06-07-2007, 11:40 PM
andy83 andy83 is offline
Senior Member
 

Join Date: Apr 2007
Posts: 119
Construction Journal: 40gal Breeder(with pics)
Default More Great Stuff

Well,
I'm almost complete with the great stuff. It will look very different after I apply just a little more and then carve it out.


I want to create a space behind the waterfall that will have rocks and moss if at all possible. I'm still not for sure on how exactly the waterfall will look like but I think I'm going to have a small stream on top and then have it break down to the bottom over a slate cliff.


I just bought this to help out a little on the shaping.

Reply With Quote
  #4  
Old 06-07-2007, 11:43 PM
andy83 andy83 is offline
Senior Member
 

Join Date: Apr 2007
Posts: 119
Construction Journal: 40gal Breeder(with pics)
Default Carving Time

Well,

I just got around to the carving part. The great stuff did shrink a little in the time that it has cured(about 5 days) but I think the heavy silicon backing really helped it stay secure.


I've still got a bit of carving left to do. I'm really pleased so far with that exacto knife kit.

-Andy
Reply With Quote
  #5  
Old 06-07-2007, 11:44 PM
andy83 andy83 is offline
Senior Member
 

Join Date: Apr 2007
Posts: 119
Construction Journal: 40gal Breeder(with pics)
Default More Carving...


Reply With Quote
  #6  
Old 06-07-2007, 11:48 PM
andy83 andy83 is offline
Senior Member
 

Join Date: Apr 2007
Posts: 119
Construction Journal: 40gal Breeder(with pics)
Default In response to a question on the Great Stuff

Yeah,

I'm hoping that it doesn't really shrink anymore. I really took my time spraying it in layer by layer. I would let each layer get somewhat firm and then I would leave a high powered fan on it for a while. Then I would spray it with water, turn the fan back on and wait. This generally took about 30min for each layer(or longer).

I think it took a couple of days to spray all of it in. Then, I let it sit for 5 days or so. During this time it shrunk a decent amount. I haven't seen any more shrinkage that I can tell. From cutting it away from the silicon after it had cured it didn't pull away from the silicon.

It will be a task to cover all of that in silicon but it will look good. I'm a little trigger happy at the moment but I've got to order some cocos panels for the back before I start with that.
Reply With Quote
  #7  
Old 06-07-2007, 11:50 PM
andy83 andy83 is offline
Senior Member
 

Join Date: Apr 2007
Posts: 119
Construction Journal: 40gal Breeder(with pics)
Default 9/28/06 Update

Hey everybody,

Sorry for the bad pic but I went ahead and put some tree fern fiber panels on my background. I think I can hide the gaps with my philodendron.


Last edited by andy83; 06-07-2007 at 11:55 PM..
Reply With Quote
  #8  
Old 06-07-2007, 11:51 PM
andy83 andy83 is offline
Senior Member
 

Join Date: Apr 2007
Posts: 119
Construction Journal: 40gal Breeder(with pics)
Default

I know, I know.....not much of an update....


This stuff should be dry in another day. Perfect timing for the weekend. If it's not dry it won't stick to the silicon. It drys much much faster if you spread it out. I suppose this step could have been done a while ago to save some time.

-Andy

Last edited by andy83; 06-07-2007 at 11:54 PM..
Reply With Quote
  #9  
Old 06-08-2007, 12:11 AM
andy83 andy83 is offline
Senior Member
 

Join Date: Apr 2007
Posts: 119
Construction Journal: 40gal Breeder(with pics)
Default 10/25/06 Update

Well,

The coco fiber is definitely dry now. I used a dremel to smooth it out a little more and then I started to silicon. The top part has taken about two tubes.


Not too much to go after all of this dries. I can't wait to test the pump and see how it works. I should have bought a case of silicon. I don't even want to know how much I've used so far.

-Andy
Reply With Quote
  #10  
Old 06-08-2007, 12:12 AM
andy83 andy83 is offline
Senior Member
 

Join Date: Apr 2007
Posts: 119
Construction Journal: 40gal Breeder(with pics)
Default

Sorry about the weird angle but it works out best to have gravity on your side when you're letting the coco fiber stick to the silicon. I've got a little more to do but it's almost done.

There are still a few spots where the silicon shows through but I think with time and lots of moss spores that won't be an issue down the road.

I'll put more pics up later when the rest has cured a little.

Reply With Quote
Reply

Bookmarks

Tags
bottom, crate, filter, tank, water, pics, breederwith, 40gal, journal, construction


Currently Active Users Viewing This Thread: 1 (0 members and 1 guests)
 

Posting Rules
You may not post new threads
You may not post replies
You may not post attachments
You may not edit your posts

BB code is On
Smilies are On
[IMG] code is On
HTML code is Off


All times are GMT -4. The time now is 02:55 AM.

© 2007 OrchidBoard.com
Search Engine Optimisation provided by DragonByte SEO v2.0.37 (Lite) - vBulletin Mods & Addons Copyright © 2025 DragonByte Technologies Ltd.
Feedback Buttons provided by Advanced Post Thanks / Like (Lite) - vBulletin Mods & Addons Copyright © 2025 DragonByte Technologies Ltd.

Clubs vBulletin Plugins by Drive Thru Online, Inc.