In this method the images are stored against the post.
They can either appear at the bottom of the post or can be placed between the text in your chosen position. I have used these in this thread with screen shots.
Resizing an Image
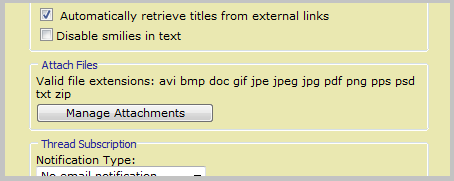
Attached images have maxium size limitations. If your photo fails to upload using the steps above, and doesn't give an error message then the most likely reason is that it is too big.
When you are in the 'Manage Attachements' screen the lower half of the screen shows the size limits.
Each user also has a limit on the space for attachements (usually 50MB, bigger for forum supporters).
There are some free tools available to help resize images if you don't already have one.
See the post below for details.
Attaching an image
On a new thread scroll down to find the 'Attach Files' option and the 'Manage Attachments' button.
On a reply to an existing thread click the 'Go Advanced' button at the bottom of the reply box first. This will cause the same options to appear as for a new thread.
Clicking the button will open a new page. At the top of this you can choose the file(s) on your PC to upload, or in the box just below a file from a URL, that is elsewhere on the web (please only if you own the photo).

Then click the upload button.

This will copy the file from it's current location (i.e. your PC) onto the Orchid Board server where others viewing OB will be able to see it. This may take a little time, usually you will be able to see a progress bar in the bottom of your browser but this will depend on which internet browser you use.
Once the files are uploaded they will show in a list just below where you entered them.
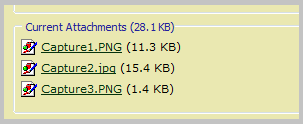
Once they are uploaded you can click the 'Close This Window' button at the bottom of the 'Manage Attachements' window and you will be taken back to your message.
This is all you need to do for the images to appear in a 'film strip' at the bottom of your post and this is how most people post them.
-------------------------------------------------
However it is also quite easy to add the images throughout your text if you want using the following method.
Put the cursor where you want the image to appear in your text. Then click on the paperclip icon at the top of your post. A list of your uploaded images will appear.
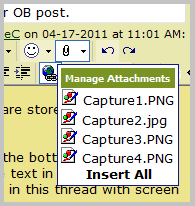
Click the image you want to place at the cursor point. Text will appear in your message a bit like this.

If you want to move the image you can cut & paste the location of this text. The number in the middle is a unique itentifier for your image accross attachments stored on OB.
All the images I've used above have been posted using this method.


 Hybrid Mode

